
Setup 3-Node MariaDB Cluster with HA Proxy on VirtualBox
Part 1: Setup a Virtual Machine Template Part 2: Setup 3-Node MariaDB Cluster
Today we will use the MariaDB Cluster cluster we created in the previous two blog entries, and tie it all together with an HA Proxy virtual machine setup with separate read and write pools. This assumes your application is already using different connections for reads and writes, or you’re using MaxScale, MySQL Proxy, etc to splits reads and writes.
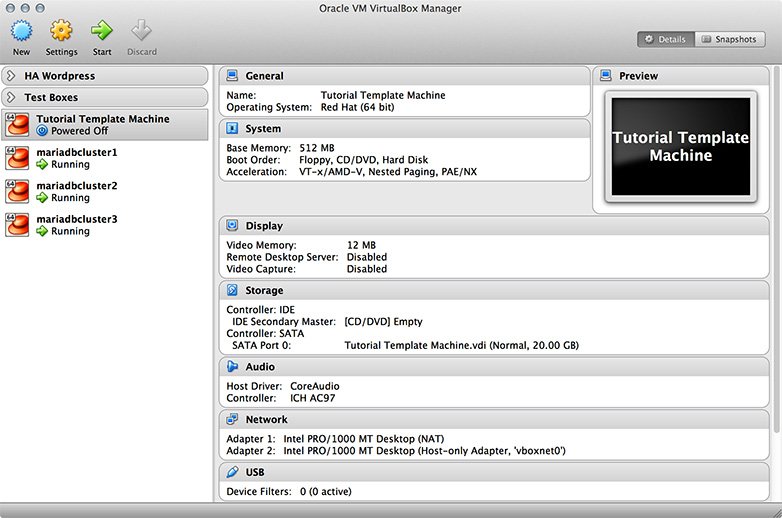
First we need to clone the virtual machine template. When you start up Virtual Box, you should see the virtual machine template on the left that we created in the first part of this series.
Highlight the virtual machine template in the left column, and press Command + O. This should open a new window where we can name the new virtual machine. Be sure to check “Reinitialize the MAC address of all network cards”.

Next is choosing “Full clone” or “Linked clone”. Select “Full clone” and continue.

You should now see the haproxy1 virtual machine in the list.

Highlight the new haproxy1 virtual machine, and click “Start” towards the upper left corner of the window (green arrow icon). Once it starts, log in as root and run the clone_network_setup.sh script. The script will reboot the virtual machine. For this tutorial, I will be using IP address 192.168.56.224 and hostname haproxy1.
[root@tutorial_template ~]# ~/clone_network_setup.sh 192.168.56.224 haproxy1
You should now be able to login to the haproxy1 virtual machine via iTerm.
bens-mbp:~ ben$ ssh root@192.168.56.224
The authenticity of host '192.168.56.224 (192.168.56.224)' can't be established.
RSA key fingerprint is 37:9a:b9:2d:4b:29:c7:a6:87:76:5a:24:89:1a:a6:cb.
Are you sure you want to continue connecting (yes/no)? yes
Warning: Permanently added '192.168.56.224' (RSA) to the list of known hosts.
root@192.168.56.224's password:
Last login: Mon Jun 30 10:56:29 2014
[root@haproxy1 ~]#
Verify the hostname and network interface is setup.
[root@haproxy1 ~]# echo $HOSTNAME
haproxy1
[root@haproxy1 ~]# ifconfig eth1
eth1      Link encap:Ethernet  HWaddr 08:00:27:B1:68:DC
          inet addr:192.168.56.224  Bcast:192.168.56.255  Mask:255.255.255.0
          inet6 addr: fe80::a00:27ff:feb1:68dc/64 Scope:Link
          UP BROADCAST RUNNING MULTICAST  MTU:1500  Metric:1
          RX packets:90 errors:0 dropped:0 overruns:0 frame:0
          TX packets:63 errors:0 dropped:0 overruns:0 carrier:0
          collisions:0 txqueuelen:1000
          RX bytes:10057 (9.8 KiB)  TX bytes:8003 (7.8 KiB)
Ping google.com.
[root@haproxy1 ~]# ping google.com
PING google.com (74.125.225.32) 56(84) bytes of data.
64 bytes from ord08s06-in-f0.1e100.net (74.125.225.32): icmp_seq=1 ttl=63 time=33.0 ms
64 bytes from ord08s06-in-f0.1e100.net (74.125.225.32): icmp_seq=2 ttl=63 time=32.3 ms
64 bytes from ord08s06-in-f0.1e100.net (74.125.225.32): icmp_seq=3 ttl=63 time=31.9 ms
^C
--- google.com ping statistics ---
3 packets transmitted, 3 received, 0% packet loss, time 2366ms
rtt min/avg/max/mdev = 31.985/32.460/33.066/0.496 ms
The haproxy1 node is now ready. Now let’s install HA Proxy.
[root@haproxy1 ~]# yum install haproxy
Loaded plugins: fastestmirror
Determining fastest mirrors
 * base: centos.mirrors.tds.net
 * extras: mirror.cisp.com
 * updates: ftpmirror.your.org
base                                                                                      | 3.7 kB     00:00
extras                                                                                    | 3.4 kB     00:00
mariadb                                                                                   | 1.9 kB     00:00
mariadb/primary_db                                                                        |  16 kB     00:00
percona                                                                                   |  951 B     00:00
percona/primary                                                                           |  87 kB     00:00
percona                                                                                                  293/293
updates                                                                                   | 3.4 kB     00:00
updates/primary_db                                                                        | 3.7 MB     00:03
Setting up Install Process
Resolving Dependencies
--> Running transaction check
---> Package haproxy.x86_64 0:1.4.24-2.el6 will be installed
--> Finished Dependency Resolution

Dependencies Resolved

=================================================================================================================
 Package                   Arch                     Version                         Repository              Size
=================================================================================================================
Installing:
 haproxy                   x86_64                   1.4.24-2.el6                    base                   457 k

Transaction Summary
=================================================================================================================
Install       1 Package(s)

Total download size: 457 k
Installed size: 1.5 M
Is this ok [y/N]: y
Downloading Packages:
haproxy-1.4.24-2.el6.x86_64.rpm                                                                                | 457 kB     00:00
Running rpm_check_debug
Running Transaction Test
Transaction Test Succeeded
Running Transaction
  Installing : haproxy-1.4.24-2.el6.x86_64                                                                                        1/1
  Verifying  : haproxy-1.4.24-2.el6.x86_64                                                                                        1/1

Installed:
  haproxy.x86_64 0:1.4.24-2.el6

Complete!
Next you will need the clustercheck script (https://github.com/olafz/percona-clustercheck). This script monitors the Galera status on each node, and returns 200 if the node is up and synced or 503 if not. This is used by HAProxy to determine whether or not to send traffic to that node. Copy the clustercheck script from the repository to each of the MariaDB Cluster nodes. For this example, I put it in /usr/bin. Chmod the clustercheck script so it is executable.
[root@mariadbcluster1 bin]# mv /tmp/clustercheck /usr/bin/
[root@mariadbcluster1 bin]# ls -al | grep clustercheck
-rw-r--r--.  1 root root       3086 May  9 23:52 clustercheck
[root@mariadbcluster1 bin]# chmod 755 clustercheck
[root@mariadbcluster1 bin]# ls -al | grep clustercheck
-rwxr-xr-x.  1 root root       3086 May  9 23:52 clustercheck
Next we add the cluster check user to the cluster nodes. By default, clustercheck connects with user clustercheckuser and password clustercheckpassword!. This is configurable.
[root@mariadbcluster1 bin]# mysql -u root -p
Enter password:
Welcome to the MariaDB monitor.  Commands end with ; or g.
Your MariaDB connection id is 5
Server version: 5.5.36-MariaDB-wsrep MariaDB Server, wsrep_25.9.r3961

Copyright (c) 2000, 2014, Oracle, Monty Program Ab and others.

Type 'help;' or 'h' for help. Type 'c' to clear the current input statement.

MariaDB [(none)]> GRANT PROCESS ON *.* TO 'clustercheckuser'@'localhost' IDENTIFIED BY 'clustercheckpassword!' ;
Query OK, 0 rows affected (0.00 sec)
You can verify it has been replicated to the other nodes.
[root@mariadbcluster2 ~]# mysql -u root -p
Enter password:
Welcome to the MariaDB monitor.  Commands end with ; or g.
Your MariaDB connection id is 9
Server version: 5.5.36-MariaDB-wsrep MariaDB Server, wsrep_25.9.r3961

Copyright (c) 2000, 2014, Oracle, Monty Program Ab and others.

Type 'help;' or 'h' for help. Type 'c' to clear the current input statement.

MariaDB [(none)]> select user, host from mysql.user where user = 'clustercheckuser';
+------------------+-----------+
| user             | host      |
+------------------+-----------+
| clustercheckuser | localhost |
+------------------+-----------+
1 row in set (0.00 sec)
[root@mariadbcluster3 ~]# mysql -u root -p
Enter password:
Welcome to the MariaDB monitor.  Commands end with ; or g.
Your MariaDB connection id is 4
Server version: 5.5.36-MariaDB-wsrep MariaDB Server, wsrep_25.9.r3961

Copyright (c) 2000, 2014, Oracle, Monty Program Ab and others.

Type 'help;' or 'h' for help. Type 'c' to clear the current input statement.

MariaDB [(none)]> select user, host from mysql.user where user = 'clustercheckuser';
+------------------+-----------+
| user             | host      |
+------------------+-----------+
| clustercheckuser | localhost |
+------------------+-----------+
1 row in set (0.00 sec)
Install xinetd on each MariaDB Cluster node if it isn’t already installed.
[root@mariadbcluster1 init.d]# yum install xinetd
Loaded plugins: fastestmirror
Determining fastest mirrors
 * base: mirror.teklinks.com
 * extras: mirror.beyondhosting.net
 * updates: mirror.es.its.nyu.edu
base				| 3.7 kB     00:00
extras				| 3.4 kB     00:00
mariadb				| 1.9 kB     00:00
mariadb/primary_db		|  16 kB     00:00
percona				|  951 B     00:00
percona/primary			|  87 kB     00:00
percona                                                                                                                       293/293
updates				| 3.4 kB     00:00
updates/primary_db		| 3.7 MB     00:01
Setting up Install Process
Resolving Dependencies
--> Running transaction check
---> Package xinetd.x86_64 2:2.3.14-39.el6_4 will be installed
--> Finished Dependency Resolution

Dependencies Resolved

======================================================================================================================================
 Package                      Arch                         Version                                   Repository                  Size
======================================================================================================================================
Installing:
 xinetd                       x86_64                       2:2.3.14-39.el6_4                         base                       121 k

Transaction Summary
======================================================================================================================================
Install       1 Package(s)

Total download size: 121 k
Installed size: 259 k
Is this ok [y/N]: y
Downloading Packages:
xinetd-2.3.14-39.el6_4.x86_64.rpm                                                                              | 121 kB     00:00
Running rpm_check_debug
Running Transaction Test
Transaction Test Succeeded
Running Transaction
  Installing : 2:xinetd-2.3.14-39.el6_4.x86_64			1/1
  Verifying  : 2:xinetd-2.3.14-39.el6_4.x86_64			1/1

Installed:
  xinetd.x86_64 2:2.3.14-39.el6_4

Complete!
On each MariaDB Cluster node, create a xinetd config for clustercheck.
[root@mariadbcluster1 /]# cat /etc/xinetd.d/mysqlchk
# default: on
# description: mysqlchk
service mysqlchk
{
        disable = no
        flags = REUSE
        socket_type = stream
        port = 9200
        wait = no
        user = nobody
        server = /usr/bin/clustercheck
        log_on_failure += USERID
        only_from = 0.0.0.0/0
        per_source = UNLIMITED
}
Edit /etc/services on each MariaDB Cluster node. Comment out the two existing entries for port 9200, and insert the new entry for clustercheck.
mysqlchk        9200/tcp                # Galera Clustercheck
# wap-wsp       9200/tcp                # WAP connectionless session service
# wap-wsp       9200/udp                # WAP connectionless session service
On each MariaDB Cluster node, start xinetd.
[root@mariadbcluster1 /]# service xinetd start
Starting xinetd:                                           [  OK  ]
From each of the MariaDB Cluster nodes, you should be able to run clustercheck from the commandline and see returned results. You can ignore the part about “Percona XtraDB Cluster Node”. This is hardcoded in the script and is not pulling from the MariaDB install.
[root@mariadbcluster1 /]# /usr/bin/clustercheck
HTTP/1.1 200 OK
Content-Type: text/plain
Connection: close
Content-Length: 40

Percona XtraDB Cluster Node is synced.
Now we create the pools by editing the HAProxy configuration file. It would be a good idea to backup the existing (default) haproxy.cfg file before making edits.
[root@haproxy1 haproxy]# cat /etc/haproxy/haproxy.cfg
global
        log 127.0.0.1   local0
        log 127.0.0.1   local1 notice
        maxconn 1024
        user haproxy
        group haproxy
        daemon

defaults
        log     global
        mode    http
        option  tcplog
        option  dontlognull
        retries 3
        option  redispatch
        maxconn 1024
        timeout connect 5000ms
        timeout client 50000ms
        timeout server 50000ms

listen mariadb_cluster_writes 0.0.0.0:13304
## A failover pool for writes to ensure writes only hit one node at a time.
        mode tcp
        option httpchk
        server galera-node01 192.168.56.221:3306 check port 9200
        server galera-node02 192.168.56.222:3306 check port 9200 backup
        server galera-node03 192.168.56.223:3306 check port 9200 backup

listen mariadb_cluster_reads 0.0.0.0:13305
## A load-balanced pool for reads to utilize all nodes for reads.
        mode tcp
        balance leastconn
        option httpchk
	server galera-node01 192.168.56.221:3306 check port 9200
        server galera-node02 192.168.56.222:3306 check port 9200
        server galera-node03 192.168.56.223:3306 check port 9200

listen stats 0.0.0.0:9000
## HAProxy stats web gui.
	mode http
	stats enable
	stats uri /haproxy_stats
	stats realm HAProxy Statistics
	stats auth haproxy:haproxy
	stats admin if TRUE
Start HAProxy. After it starts, you should see the server now listening on *:13304, *:13305, and *:9000.
[root@haproxy1 haproxy]# service haproxy start
Starting haproxy:                                          [  OK  ]
From a web browser, visit http://192.168.56.224:9000/haproxy_stats and login with user haproxy and password haproxy (configurable in haproxy.cfg). You should see three pools; mariadb_cluster_writes, mariadb_cluster_reads, and stats. Notice in the writes pool, only one node is active (green). The other two are blue and listed as backups. In the read pool, all three nodes are active.

MariaDB/MySQL traffic can now be routed through the HAProxy load-balancer.
Connections sent to port 13305 will be connected to the node with the least amount of connections to load-balance the SELECTS across all available nodes.
[root@haproxy1 haproxy]# mysql -u root -p -h 192.168.56.224 -P 13305 -e "SELECT @@hostname"
Enter password:
+-----------------+
| @@hostname      |
+-----------------+
| mariadbcluster2 |
+-----------------+
[root@haproxy1 haproxy]# mysql -u root -p -h 192.168.56.224 -P 13305 -e "SELECT @@hostname"
Enter password:
+-----------------+
| @@hostname      |
+-----------------+
| mariadbcluster3 |
+-----------------+
[root@haproxy1 haproxy]# mysql -u root -p -h 192.168.56.224 -P 13305 -e "SELECT @@hostname"
Enter password:
+-----------------+
| @@hostname      |
+-----------------+
| mariadbcluster1 |
+-----------------+
Connections sent to port 13304 will only be connected to one node at a time, ensuring writes only happen on one node to avoid deadlocks and other possible issues. In this setup, writes will always be sent to node 1 if it is up.
[root@haproxy1 haproxy]# mysql -u root -p -h 192.168.56.224 -P 13304 -e "SELECT @@hostname"
Enter password:
+-----------------+
| @@hostname      |
+-----------------+
| mariadbcluster1 |
+-----------------+
[root@haproxy1 haproxy]# mysql -u root -p -h 192.168.56.224 -P 13304 -e "SELECT @@hostname"
Enter password:
+-----------------+
| @@hostname      |
+-----------------+
| mariadbcluster1 |
+-----------------+
[root@haproxy1 haproxy]# mysql -u root -p -h 192.168.56.224 -P 13304 -e "SELECT @@hostname"
Enter password:
+-----------------+
| @@hostname      |
+-----------------+
| mariadbcluster1 |
For further safety, create users with read-only privileges to use with the reads pool, and users with other privileges as needed for the writes pool.