
Many developers use master-slave replication to solve a number of different problems, including problems with performance, supporting the backup of different databases, and as a part of a larger solution to alleviate system failures. Traditionally, master-slave replication is done with real servers, but it can also be done with cloud database servers. This guest post from Jelastic (originally published here) describes how to set up MariaDB master-slave replication using their Jelastic PaaS (Platform as a Service).
Replication Overview
Master-slave replication enables data from one database server (the master) to be replicated to one or more other database servers (the slaves). The master logs the updates, which then ripple through to the slaves. The slave outputs a message stating that it has received the update successfully, thus allowing the sending of subsequent updates. Master-slave replication can be either synchronous or asynchronous. The difference is simply the timing of propagation of changes. If the changes are made to the master and slave at the same time, it is synchronous. If changes are queued up and written later, it is asynchronous.

Usage targets for replication in MariaDB include:
ac
- Scale-out solutions — spreading the load among multiple slaves to improve performance. In this environment, all writes and updates must take place on the master server. Reads, however, may take place on one or more slaves. This model can improve the performance of writes (since the master is dedicated to updates), while dramatically increasing read speed across an increasing number of slaves.
- Data security — as data is replicated to the slave, and the slave can pause the replication process, it is possible to run backup services on the slave without corrupting the corresponding master data.
- Analytics — live data can be created on the master, while the analysis of the information can take place on the slave without affecting the performance of the master.
- Long-distance data distribution — if a branch office would like to work with a copy of our main data, we can use replication to create a local copy of the data for their use without requiring permanent access to the master.
Let’s examine a few examples on how we can use such replication and take advantage of it:
- Backups: to use replication as a backup solution, replicate data from the master to a slave, and then back up the data slave. The slave can be paused and shut down without affecting the running operation of the master, so we can produce an effective snapshot of “live” data that would otherwise require the master to be shut down.
- Scale-out: we can use replication as a scale-out solution; that is, where we want to split up the load of database queries across multiple database servers, within some reasonable limitations. Because replication works from the distribution of one master to one or more slaves, using replication for scale-out works best in an environment where we have a high number of reads and low number of writes/updates. Most Web sites fit into this category, where users are browsing the Web site, reading articles, posts, or viewing products. Updates only occur during session management, or when making a purchase or adding a comment/message to a forum. Replication in this situation enables us to distribute the reads over the replication slaves, while still enabling our web servers to communicate with the replication master when a write is required.
- Spreading the load: there may be situations when we have a single master and want to replicate different databases to different slaves. For example, we may want to distribute different sales data to different departments to help spread the load during data analysis.
- Increasing the performance: as the number of slaves connecting to a master increases, the load, although minimal, also increases, as each slave uses a client connection to the master. Also, as each slave must receive a full copy of the master binary log, the network load on the master may also increase and create a bottleneck. If we are using a large number of slaves connected to one master, and that master is also busy processing requests (for example, as a part of a scale-out solution), then we may want to improve the performance of the replication process. One way to improve the performance of the replication process is to create a deeper replication structure that enables the master to replicate to only one slave, and for the remaining slaves to connect to this primary slave for their individual replication requirements.
- Failover alleviating: We can set up a master and a slave (or several slaves), and then write a script that monitors the master to check whether it is up. Then instruct our applications and the slaves to change master in case of failure.
- Security: we can use SSL for encrypting the transfer of the binary log required during replication, but both the master and the slave must support SSL network connections. If either host does not support SSL connections, replication through an SSL connection is not possible. Setting up replication using an SSL connection is similar to setting up a server and client using SSL. We must obtain (or create) a suitable security certificate that we can use on the master, and a similar certificate (from the same certificate authority) on each slave.
Now let’s examine a simple example on how to configure master-slave replication on Jelastic PaaS.
Create environments
*The instructions below only mention MariaDB but they are fully suitable for MySQL database servers. First of all we create two environments in Jelastic for our master and slave databases.
- Go to jelastic.com and sign up if we haven’t done it yet or log in with our Jelastic credentials by clicking the Sign In link on the page.
- Ask Jelastic to create a new environment.
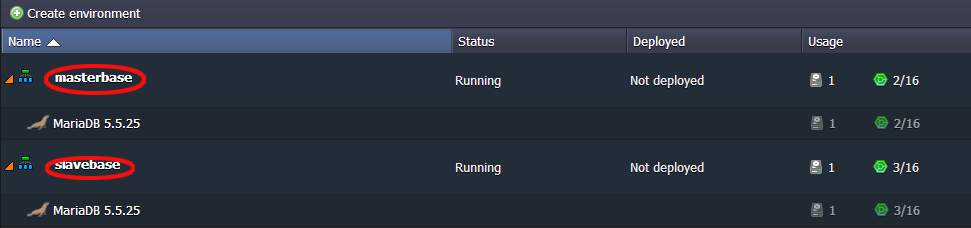
- In the Environment topology dialog pick MariaDB as a database we want to use. Set the cloudlet limit and type the name of our first environment, for example, masterbase.
 Wait just a minute for our environment to be created.
- In the same way create one more environment with MariaDB or just clone it. Let’s name it slavebase. BTW, it will be located on the other hardnode, which is even more secure and reliable for storing our data. Now we have two identical environments with two databases.
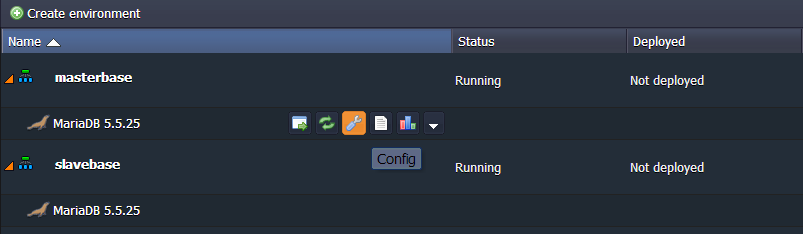
Configure master database
Let’s configure our master database now.
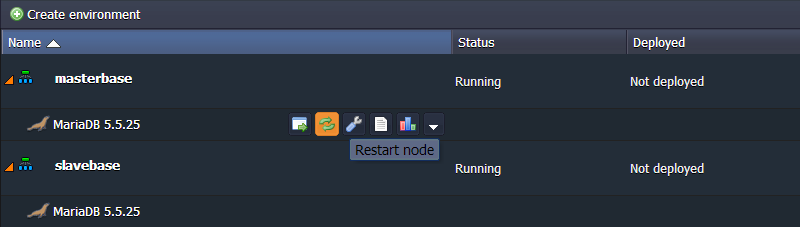
- Click the config button for our master database.
- Navigate to my.cnf file and add the following properties:
server-id = 1
log-bin = mysql-bin
binlog-format=mixed
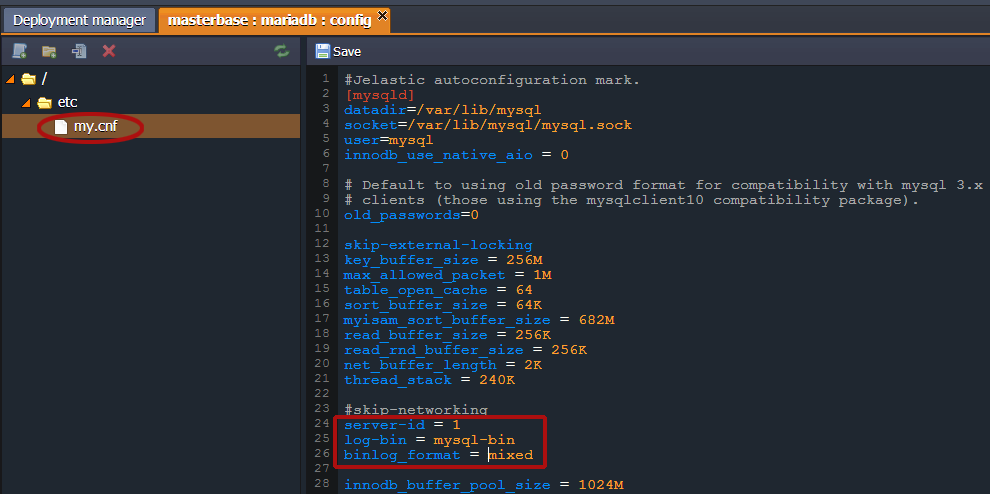
We use binlog format “mixed” (binlog-format=mixed) to allow a replication of operations with foreign keys. Note: Do not use binlog format “statement”(otherwise we will get errors later on!)
- Save the changes and restart MariaDB in order to apply the new configuration parameters.
- Click the Open in browser button for MariaDB. When we created the database, Jelastic will have sent us an email with credentials to it. Log in using these credentials.
- Navigate to the Replication tab and click on Add slave replication user.
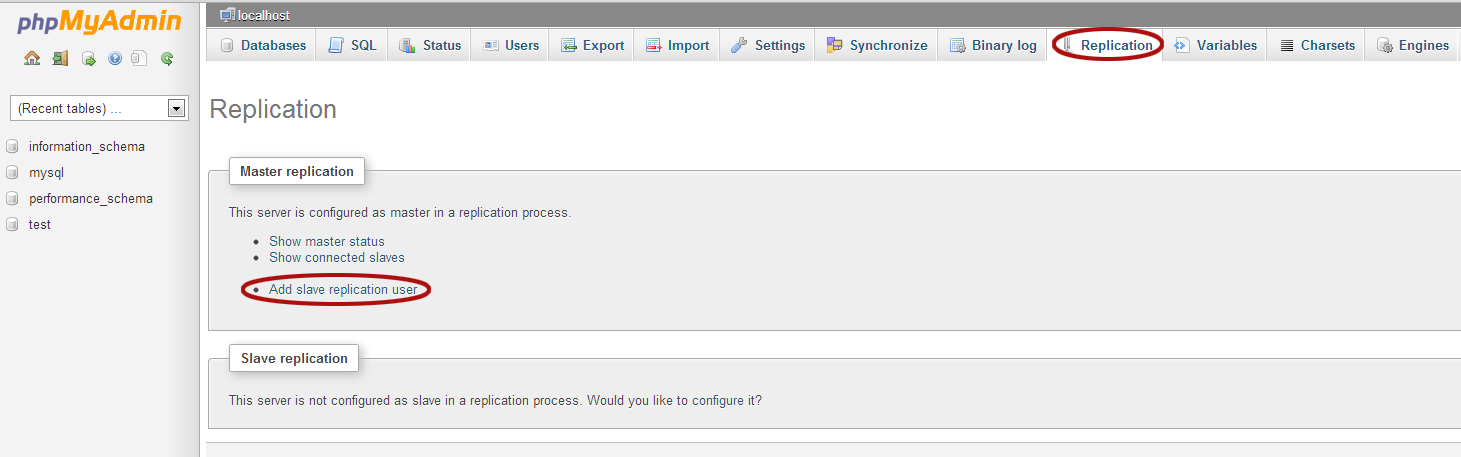
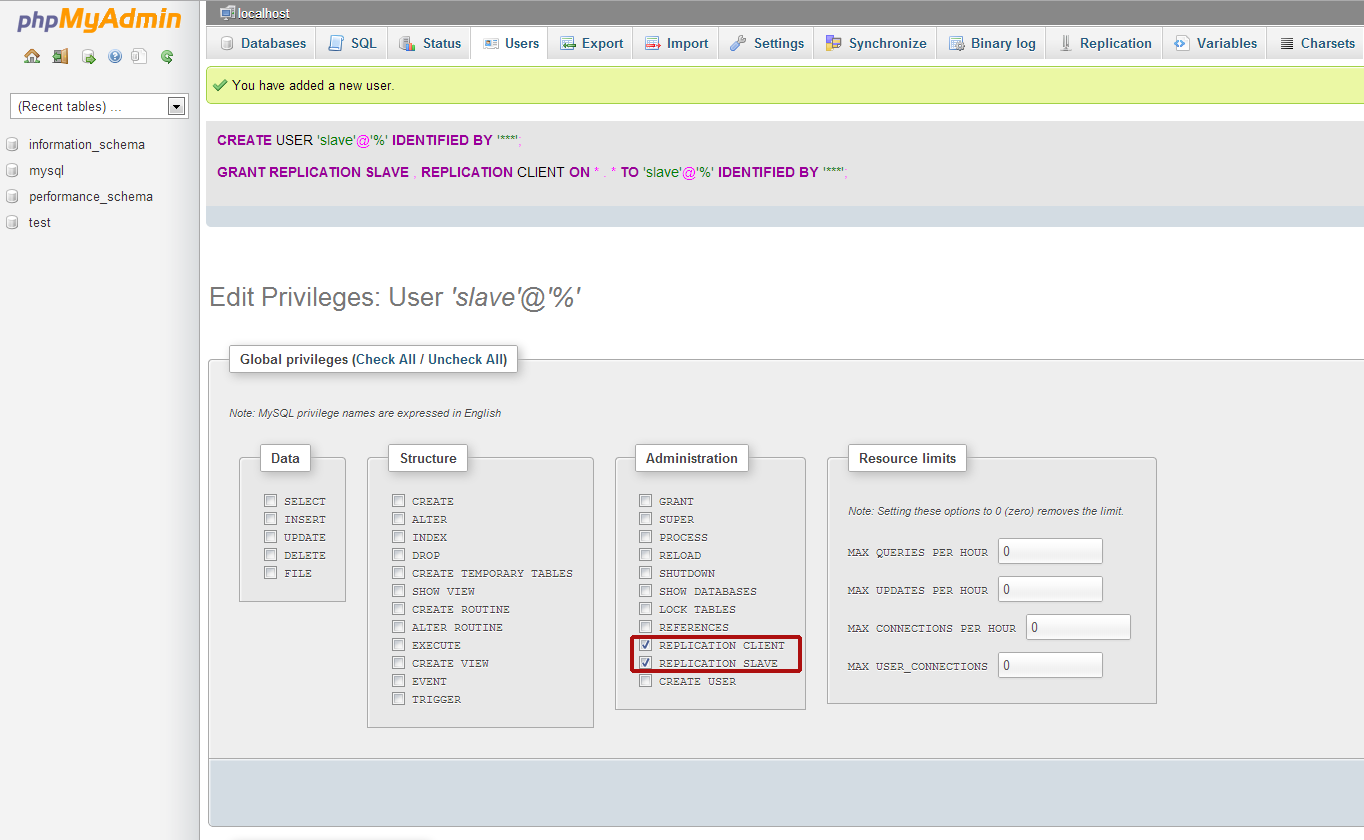
- Specify the name and password for our slave replication user and click Go.
 Now our slave user is successfully created.
Configure slave database
Let’s go back to the Jelastic dashboard and configure our slave database.
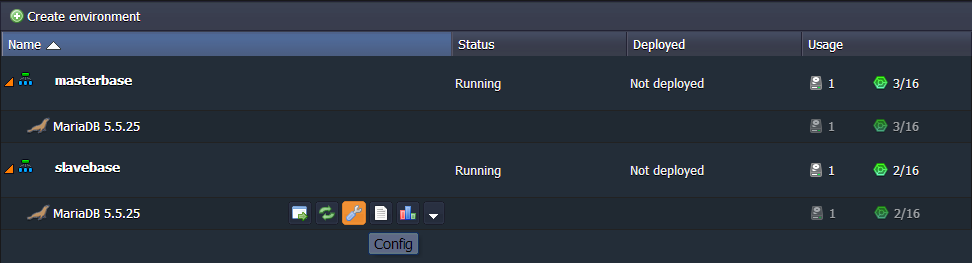
- Click the config button for our slave database.
- Navigate to the my.cnf file and add the following strings:
server-id = 2
slave-skip-errors = all

We allow our slave database to skip all errors from the master (
slave-skip-errors = all) in order not to stop normal slave operations in case of errors on the master. Don’t set this option during development as we want to see and catch all bugs, large and small, before moving our code from development to production. Production code should not have any big bugs, so setting this can be useful in that it allows replication to keep working through small, innocuous errors which could stop production and cost money (downtime, lost sales, etc…). This option can be dangerous however, so proceed with caution, and make regular backups. - Save the changes and restart our slave database server in order to apply the new configuration parameters.

- Navigate to phpMyAdmin using the credentials which Jelastic sent us when we created the environment for our slave database.
- Go to the Replication tab click configure for Slave replication.

- Configure our master server (enter the name, the password and the host of our slave replication user).
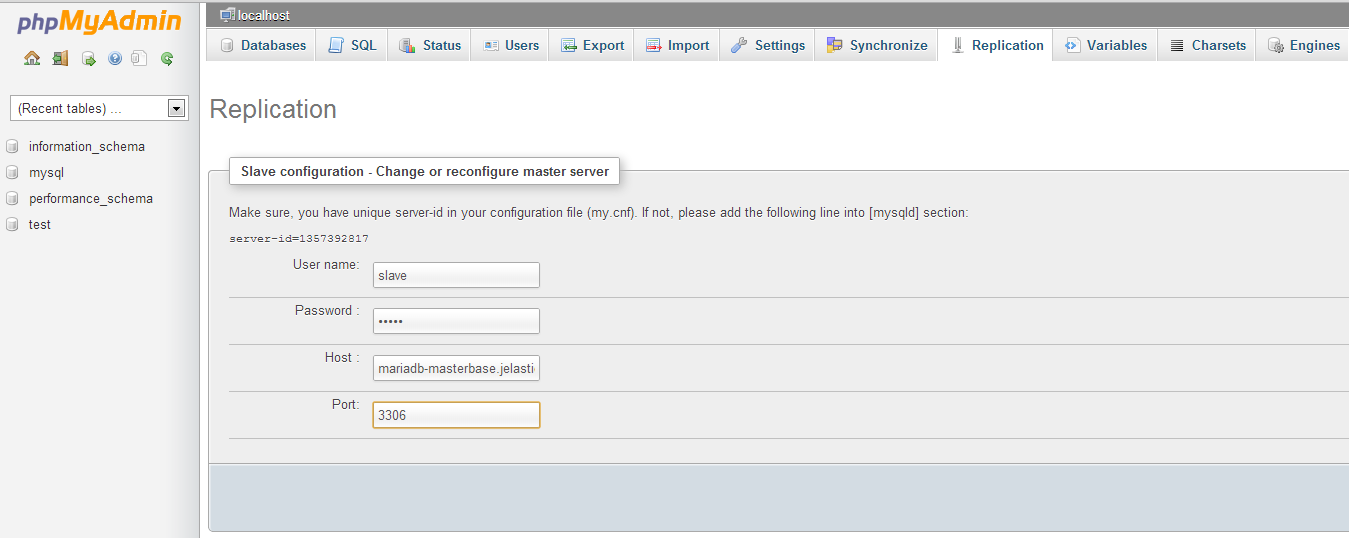 Now our master server is configured.
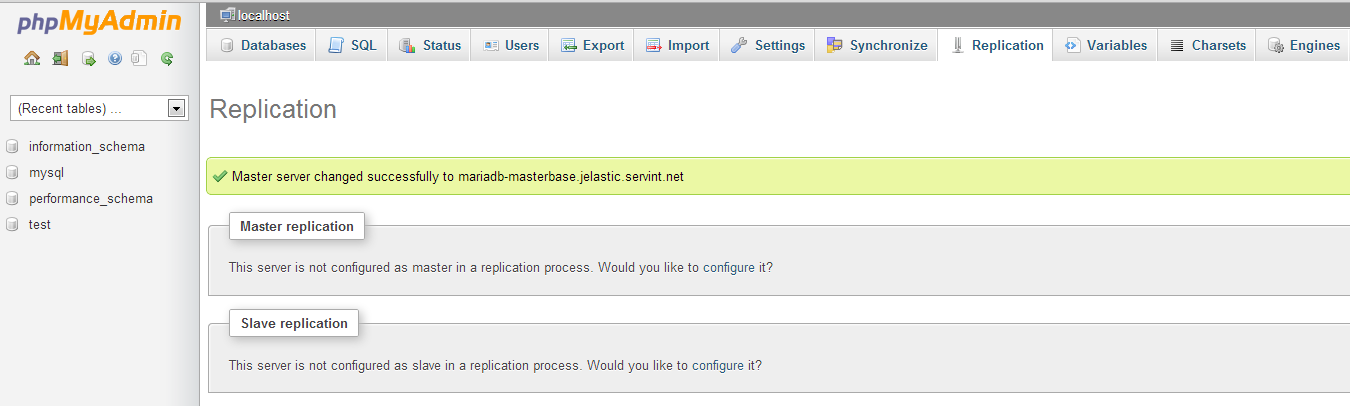
- Click on Control slave -> Full start for the slave server in order to run Slave SQL and Slave IO threads.
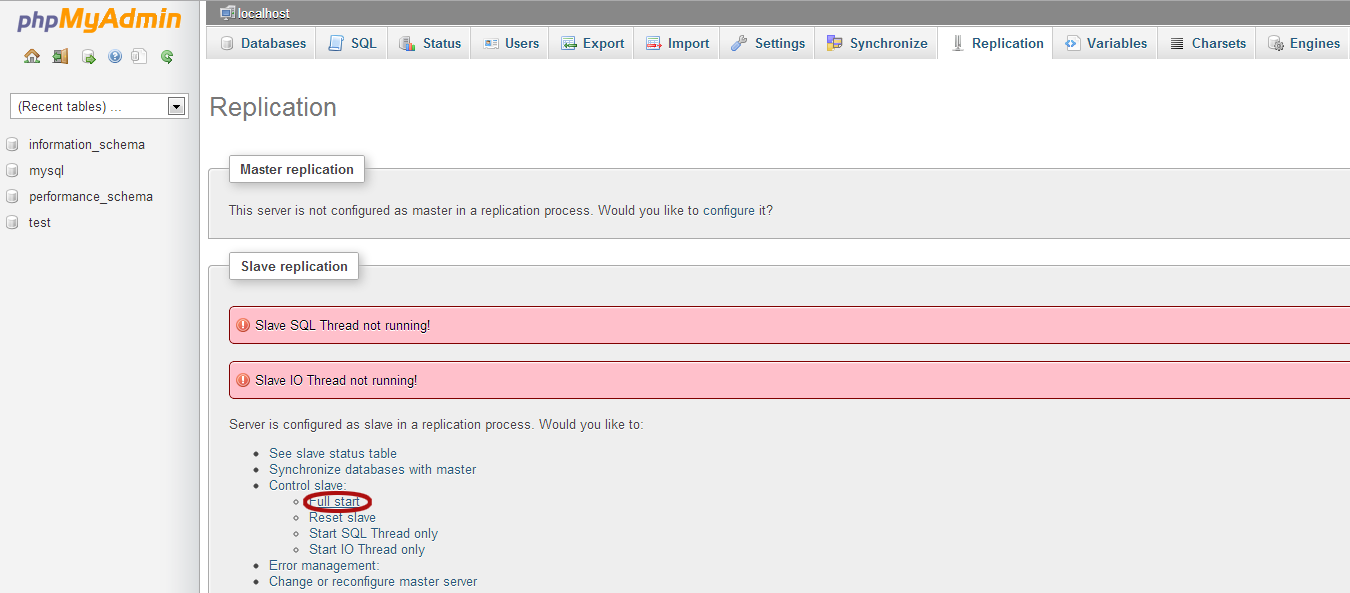
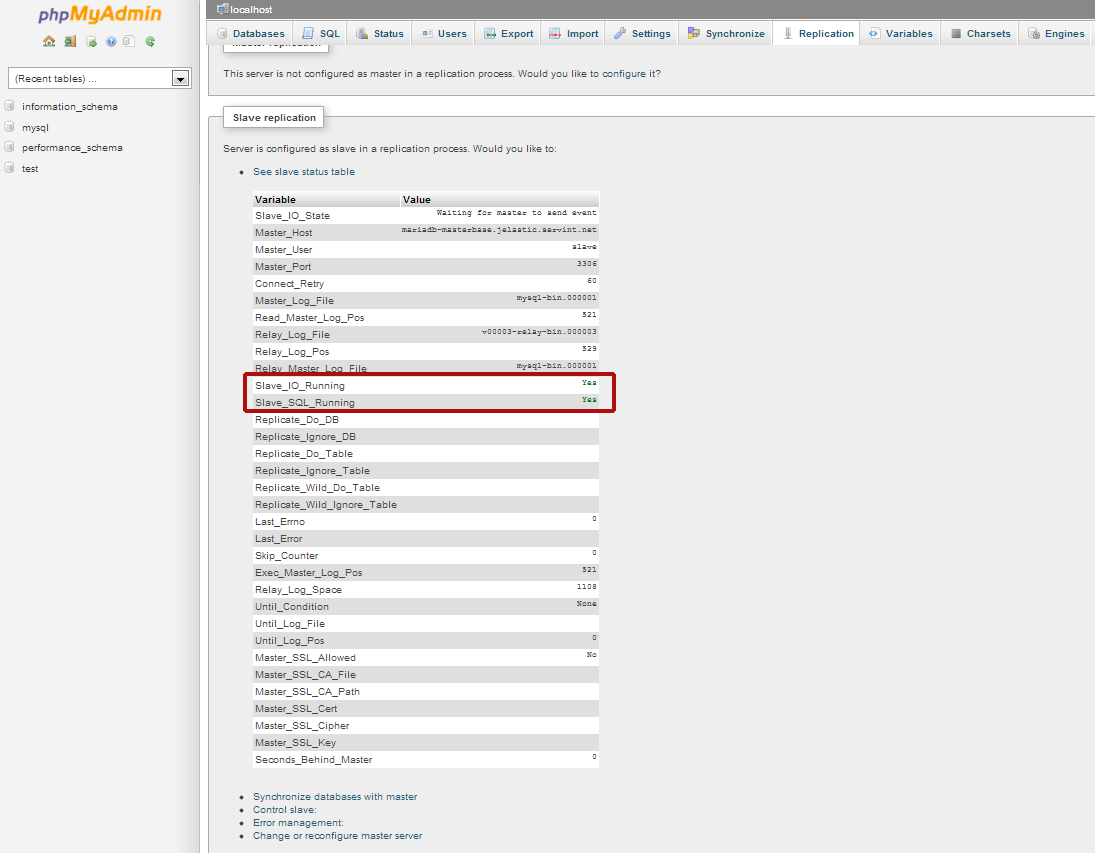
- Check the slave status table to ensure that everything is ok.
Check the results
We have to ensure now that master-slave replication works for our databases.
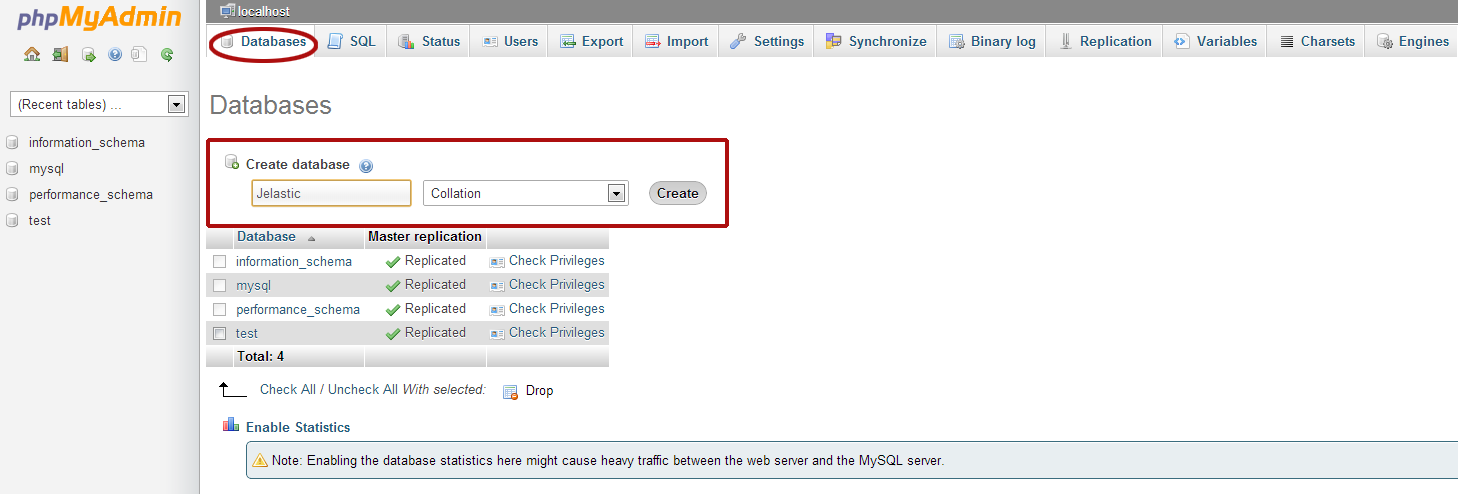
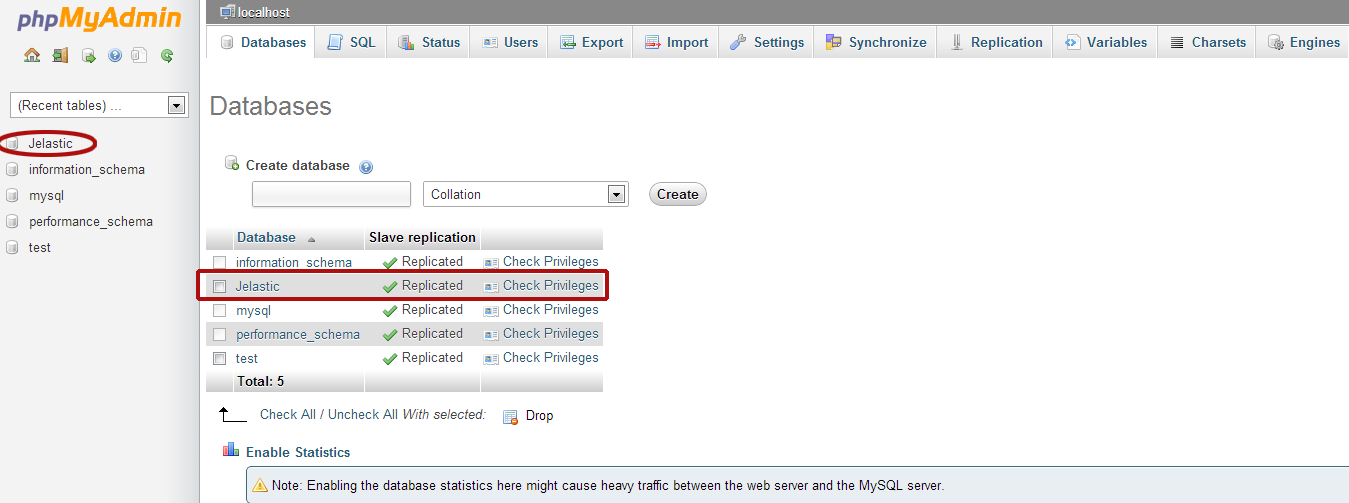
- Let’s create a new database (e.g. Jelastic) in our master database.
- Navigate to the slave database and we’ll see that the new database was successfully replicated.
Connection to master-slave
Here are two examples on how to connect to our master and slave databases from Java and PHP applications.
- Our first example is the code of a Java application which connects to our master and slave databases.Database_config.cfg:
master_host=jdbc:mysql://mariadb-master-host/mysql
master_username=root
master_password=abcABC123
slave_host=jdbc:mysql://mariadb-slave-host/mysql
slave_username=root
slave_password=abcABC123

driver=com.mysql.jdbc.Driver
Dbmanager.java:
package com.jelastic.test; import java.io.FileInputStream; import java.io.IOException; import java.sql.*; import java.util.ArrayList; import java.util.List; import java.util.Properties; import java.util.logging.Level; import java.util.logging.Logger; public class DbManager { private final static String createDatabase = "CREATE SCHEMA IF NOT EXISTS jelastic"; private final static String showDatabases = "SHOW DATABASES"; public Connection createMasterConnection() throws IOException, ClassNotFoundException, SQLException { Connection masterConnection; Properties prop = new Properties(); prop.load(new FileInputStream(System.getProperty("user.home") + "/database_config.cfg")); String master_host = prop.getProperty("master_host").toString(); String master_username = prop.getProperty("master_username").toString(); String master_password = prop.getProperty("master_password").toString(); String driver = prop.getProperty("driver").toString(); Class.forName(driver); masterConnection = DriverManager.getConnection(master_host, master_username, master_password); return masterConnection; } public Connection createSlaveConnection() throws IOException, ClassNotFoundException, SQLException { Connection slaveConnection; Properties prop = new Properties(); prop.load(new FileInputStream(System.getProperty("user.home") + "/database_config.cfg")); String slave_host = prop.getProperty("slave_host").toString(); String slave_username = prop.getProperty("slave_username").toString(); String slave_password = prop.getProperty("slave_password").toString(); String driver = prop.getProperty("driver").toString(); Class.forName(driver); slaveConnection = DriverManager.getConnection(slave_host, slave_username, slave_password); return slaveConnection; } public boolean runSqlStatementOnMaster() { boolean execute = false; Statement statement = null; try { statement = createMasterConnection().createStatement(); execute = statement.execute(createDatabase); } catch (IOException ex) { Logger.getLogger(DbManager.class.getName()).log(Level.SEVERE, null, ex); } catch (ClassNotFoundException ex) { Logger.getLogger(DbManager.class.getName()).log(Level.SEVERE, null, ex); } catch (SQLException ex) { ex.printStackTrace(); } finally { if (statement != null) { try { statement.close(); } catch (SQLException e) { e.printStackTrace(); } } } return execute; } public List<String> runSqlStatementOnSlave() { List<String> stringList = new ArrayList<String>(); Statement statement = null; ResultSet resultSet = null; try { statement = createSlaveConnection().createStatement(); resultSet = statement.executeQuery(showDatabases); while (resultSet.next()) { stringList.add(resultSet.getString(1)); } } catch (IOException ex) { Logger.getLogger(DbManager.class.getName()).log(Level.SEVERE, null, ex); } catch (ClassNotFoundException ex) { Logger.getLogger(DbManager.class.getName()).log(Level.SEVERE, null, ex); } catch (SQLException ex) { ex.printStackTrace(); } finally { if (resultSet != null) { try { resultSet.close(); } catch (SQLException e) { e.printStackTrace(); } } if (statement != null) { try { statement.close(); } catch (SQLException e) { e.printStackTrace(); } } } return stringList; } } - Our second example is a connection to our master and slave databases in a PHP application:
<?php
/* Master settings */
$master_server = "xx.xxx.x.xx";
$master_username = "root";
$master_password = "abcABC123"; /* Slave settings */
$slave_server = "xx.xxx.x.xx";
$slave_username = "root";
$slave_password = "abcABC123";$link_to_master = mysqli_connect(
$master_server,
$master_username,
$master_password,
'mysql');

if (!$link_to_master) {
printf("Unable to connect master database server. Error: %sn", mysqli_connect_error());
exit;
}

$link_to_slave = mysqli_connect(
$slave_server,
$slave_username,
$slave_password,
'mysql');

if (!$link_to_slave) {
printf("Unable to connect slave database server. Error: %sn", mysqli_connect_error());
exit;
}

print("
Creating database with name Jelastic on Master node ");

$result = mysqli_query($link_to_master, 'CREATE DATABASE JelasticX');

sleep (3);

print("
Checking if created database was replciated to slave ");

if ($result = mysqli_query($link_to_slave, 'SHOW DATABASES LIKE "JelasticX"')) {
$result_text = mysqli_fetch_array($result);
print ("
Replicated database is ".$result_text[0]);
}

mysqli_close($link_to_master);
mysqli_close($link_to_slave);
?>
Conclusion
Database replication with MariaDB adds redundancy, helps to ensure high availability, simplifies certain administrative tasks such as backups, may increase performance, and much more. It’s become easy to configure database replication in the cloud, only few minutes and everything is ready. Enjoy!