
New to MariaDB MaxScale 6 is a first look at a NoSQL listener capability, which is currently available as a technical preview. Listeners are a crucial part of MaxScale as they’re used to define a port and protocol pair that accept client connections to a service.
The gist? We’ve opened up a port on MaxScale to listen for traffic that contains NoSQL data that we then store and manage in a MariaDB database. Pretty cool, right? We think so and we’re hoping you do too. In fact, we’re releasing this capability as a tech preview because it’s a work in progress, and we’re hoping the development community will help us along the path to increasing NoSQL interoperability.
NoSQL Protocol Module
The listener’s functionality is made possible through a new nosqlprotocol module, which enables a MariaDB server or cluster to be used as the backend of an application using a MongoDB client library.
That’s right, you read that correctly; you can store NoSQL document data, provided by a MongoDB driver, directly within a MariaDB database. Internally, all documents are stored in a table containing two columns; an id column for the object id and a doc column for the document itself.
How’s that possible, you ask? Well, from the highest level, when the MongoDB client application issues MongoDB protocol commands, either directly or indirectly via the client library, they are transparently converted into the equivalent SQL and executed against the MariaDB backend. The MariaDB responses are then in turn converted into the format expected by the MongoDB client library and application.

But seeing is believing, so I think it’s best to give this new functionality a whirl to gain a better understanding of what all this means.
Requirements
Before jumping into this walk-through, you’re going to need a few things on your machine:
Getting Started
There are a few ways that you can start using MaxScale and its new NoSQL listener capabilities. There’s really no wrong approach. However, for the sake of this walkthrough I’ve created a repository that will get you up, running and testing out the new functionality within a matter of minutes using Docker.
More specifically, you’ll be using the GitHub repository located at https://github.com/mariadb-developers/mariadb-nosql-listener-quickstart to set up a new environment that will allow you to start using MaxScale, MariaDB Community Server and a sample application to check out how to manage NoSQL document data within MariaDB.
Within this section I’ll walk you through the steps for setting up the environment, configuring MaxScale and using a simple web application to manage NoSQL document data via the MongoDB Node.js driver.
Setting Up the Environment
This walkthrough will guide you down the path of creating and using Docker containers, which enable developers to easily run portable, lightweight and self-sufficient applications virtually anywhere without having to worry about setting up environmental dependencies. More specifically, you’ll be using Docker Compose, which is a tool used for defining and running multi-container Docker applications.
But, before we can get into all that, you first need to pull down the repository onto your machine.
$ git clone https://github.com/mariadb-developers/mariadb-nosql-listener-quickstart
Once you’ve got the repository pulled down to your machine, open a terminal window at the root of the new directory, dev-example-nosql-listener, and execute the following command:
$ docker-compose up
Running docker-compose up will use the file named docker-compose.yml to build, create, start and attach containers. Put more simply, it’s going to set up a collection of containers and link them appropriately.
The containers that will be created:
| Container Name | Description |
|---|---|
mxs | A container instance of the official MariaDB MaxScale image. |
mdb | A container instance of the official MariaDB Community server image. |
todo_client | A container instance of a React.js web application that provides a user interface for managing tasks (on a todo list). |
todo_api | A container instance of a Node.js application programming interface (API) that exposes REST endpoints for managing data within a database using the official MongoDB Node.js Driver. |
To confirm that the docker-compose command has worked, check the currently active (running) containers on your system by executing the following:
$ docker ps
Which should show the mxs, mdb, todo_client and todo_api containers within the output.
Adding a MaxScale Database User
Next, for MaxScale to be able to access MariaDB Community Server, you’ll need to add a new user. For this you have two options:
Option 1, use through container:
Connect to the MariaDB Community Server instance, contained within the mdb container, and use the MariaDB command-line client contained within the container, via docker, to execute the add_maxscale_user.sql script.
$ docker exec -i mdb mariadb --user root -pPassword123! < configuration/add_maxscale_user.sql
Option 2, execute through local system:
Connect to the MariaDB Community Server instance, contained within the mdb container, and use the MariaDB command-line client on your machine to execute the add_maxscale_user.sql script.
$ mariadb --host 127.0.0.1 --port 3307 --user root -pPassword123! < configuration/add_maxscale_user.sql
Configuring MariaDB MaxScale
After adding a new user, MaxScale can be configured to communicate with the MariaDB database server instance.
Ultimately, along with configuration that sets up typical read/write communication between MaxScale and MariaDB Community Server, you’re also going to be adding a block within the MaxScale configuration file that sets up the NoSQL listener, utilizing the new nosqlprotocol through port 17017.
[MongoDB-Listener]
type=listener
service=Read-Write-Service
protocol=nosqlprotocol
nosqlprotocol.user=maxscale
nosqlprotocol.password=Password123!
port=17017
For this you have two options:
Option 1, replace the config file:
Replace the MaxScale configuration file and restart the MaxScale service
a. Replace the MaxScale the default configuration file with the configuration file included in the dev-example-nosql-listener repository.
$ docker cp configuration/maxscale.cnf mxs:etc/maxscale.cnf
b. Restart the MaxScale service within the mxs container.
$ docker exec -it mxs maxscale-restart
Option 2, config with MaxScale GUI:
Using the MaxScale graphical user interface (GUI), which can be accessed by opening a browser window and navigating to http://localhost:8989.
Using the default username, admin, and password, maxscale, sign into the GUI. Doing so will take you to a dashboard. In the right corner of the dashboard there’s a button called “Create New”.
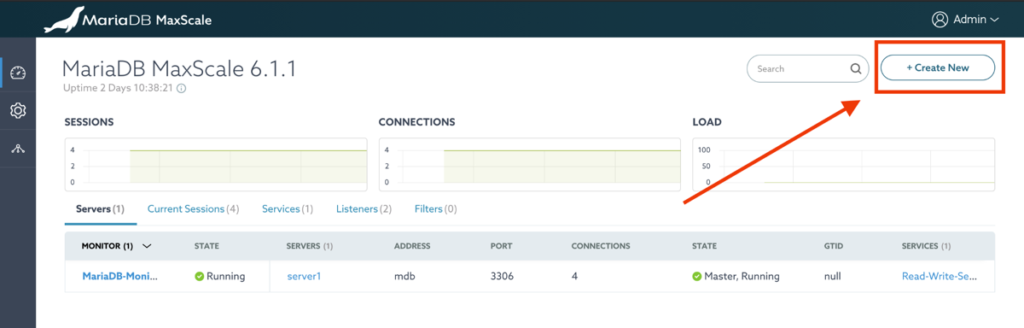
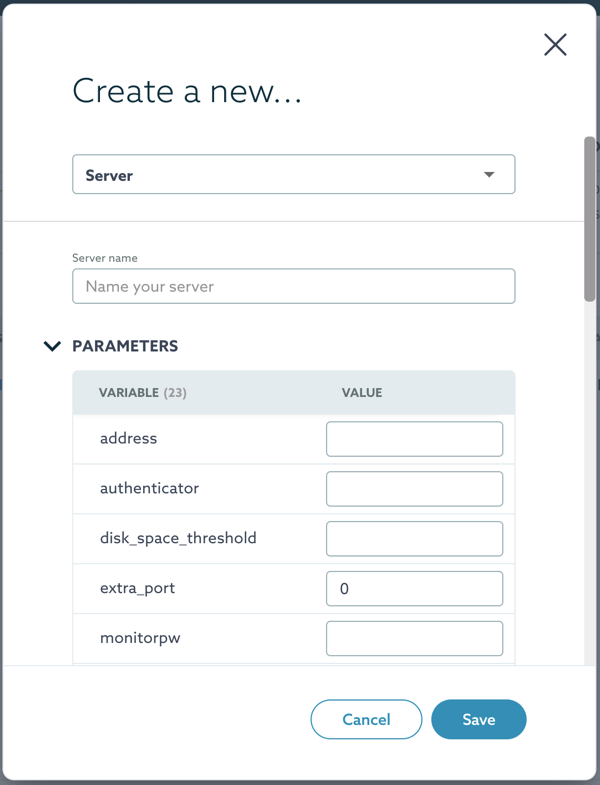
Clicking the “Create New” button will prompt a modal that allows you to create new servers, services, monitors, filters and listeners.
Basically, what this means is that you can use the GUI to configure MaxScale. Ultimately, the data you input into the interface will be saved to the MaxScale configuration file. Just as indicated in option A, you can use the configuration file within the repository as a guide for setting up the necessary components.
Using a MongoDB Driver with MariaDB
With MaxScale configured to receive NoSQL communication through port 17017, it’s time to put it to the test using the two remaining containers we’ve yet to utilize; todo_client and todo_app.
Start by opening a browser window and navigating to http://localhost:3000, which will load a web application that allows you to manage a list of tasks for, yep, you guessed it, a todo list!
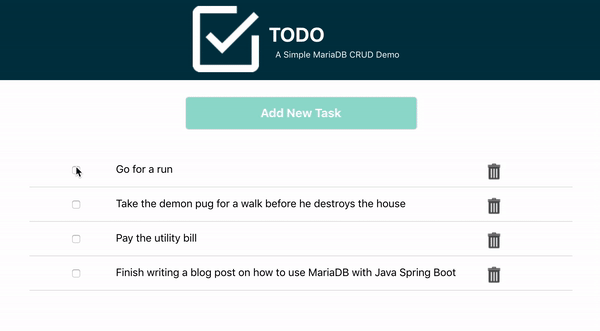
On the surface it’s apparent that the web interface for the application will allow you to perform create, read, update and delete (CRUD) operations on data. Underneath the hood this is made possible through a container, called todo_client, that hosts a React.js web application that communicates with a back-end application programming interface (API) application hosted by the todo_api container.
More specifically, the Node.js application hosted within the todo_api container exposes four endpoints that can be used by client applications and solutions to perform the four CRUD operations. The Node.js application uses the MongoDB Node.js driver to communicate with an underlying database, in this case MariaDB.
All the magic happens within the app/api/db.js
// Import the MongoDB Node driver module
const { MongoClient } = require('MongoDB');

// MongoDB connection string
const connectionUrl = 'mongodb://mxs:17017';

let db;

// Connect to the database and return a MongoClient object
const getDatabaseInstance = async (name) => {

    if (db) {
       return db;
    }

   try {
       const client = await MongoClient.connect(connectionUrl);
       db = client.db(name);
   } catch (err) {
       throw err;
   } finally {
       return db;
   }
}

module.exports = getDatabaseInstance;
You can dive deeper into the TODO client and API application source, which is included within the repository, in the app folder.
Tip: If you’re interested in running the client and API applications directly from source on your machine, be sure to check out the instructions on how to do so in the repository README!
Exploring the Data
Once you’ve set up the environment and added a couple of tasks using the TODO application, it’s time to explore the data that’s been added to MariaDB.
In fact, using the TODO application has not only added task data but the system has automatically created a new database, todo, and table, tasks, within that database. This happens because of settings, auto_create_databases and auto_create_tables, that have been enabled by default.
Using SQL
You can connect directly to the MariaDB Community Server instance, contained within the mdb container, by using the MariaDB command-line client, if you have it on your local machine by executing the following command:
$ mariadb --host 127.0.0.1 --port 3307 --user root -pPassword123!
It’s important to note that there are a variety of third-party tools and clients that you can also use to connect to MariaDB, but, for the sake of simplicity I’m just walking through the process of the MariaDB command-line client. You can find a list of third-party clients and tools that have been tested by MariaDB in the official documentation.
Tip: If you don’t have the MariaDB command-line client on your machine, no worries! Remember that you can access the MariaDB command-line client that is included within the mdb container, via docker, by executing the following command:
$ docker exec -it mdb mariadb --user root -pPassword123!
After successfully connecting to MariaDB you can now start executing SQL commands. For instance, start by showing a list of databases on the server to confirm that a database named todo has been created.
MariaDB [(none)]> show databases;

+--------------------+
| Database           |
+--------------------+
| information_schema |
| mysql              |
| performance_schema |
| sys                |
| todo               |
+--------------------+
Then, stepping into the todo database you can also see the new table, tasks, that has been created to store the document data.
MariaDB [(none)]> use todo;
MariaDB [todo]> show create table tasks;
+-------+--------------------------------------------------------------------+
| Table | Create Table                                                       |
+-------+--------------------------------------------------------------------+
| tasks | CREATE TABLE `tasks` (
            `id` varchar(35) GENERATED ALWAYS AS
               (json_compact(json_extract(`doc`,'$._id'))) VIRTUAL,
            `doc` longtext CHARACTER SET utf8mb4 COLLATE utf8mb4_bin DEFAULT
               NULL CHECK (json_valid(`doc`)),
            UNIQUE KEY `id` (`id`),
            CONSTRAINT `id_not_null` CHECK (`id` is not null)
          ) ENGINE=InnoDB DEFAULT CHARSET=utf8mb4 |
+-------+--------------------------------------------------------------------+
Notice, that the tasks table contains two columns:
id: holds the document data object iddoc: holds the document data itself
In fact, both the id and doc columns contain JSON data, which can be accessed using MariaDB’s predefined JSON functions!
MariaDB [todo]> select json_value(doc, '$.description') description, json_value(doc, '$.completed') completed from tasks;

+-------+------------------+
| description | completed  |
+-------+------------------+
| Task 1      | 0          |
| Task 2      | 1          |
| Task 3      | 0          |
| Task 4      | 1          |
+-------+------------------+
MaxScale GUI
The MaxScale graphical user interface (GUI) provides another way to explore the data.
Logging In
Start by opening a browser window and navigating to http://localhost:8989 which has been configured within MaxScale. There you’ll be prompted to login.
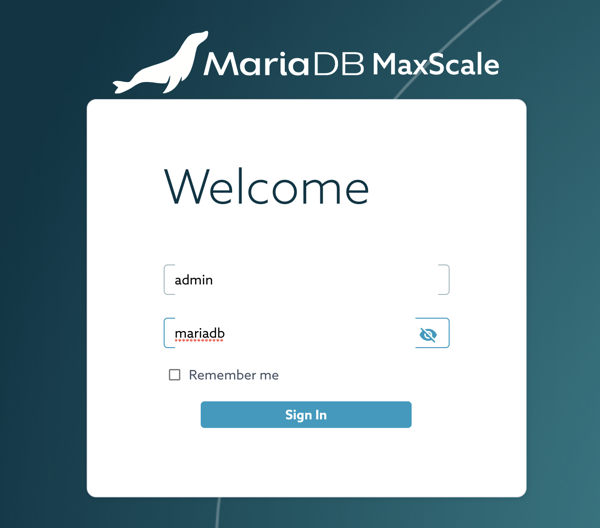
Note: The default username is admin and the password is maxscale.
Dashboard
After you’ve logged in you’ll be taken to a dashboard that gives you information on MaxScale, including the service and listener configuration information.

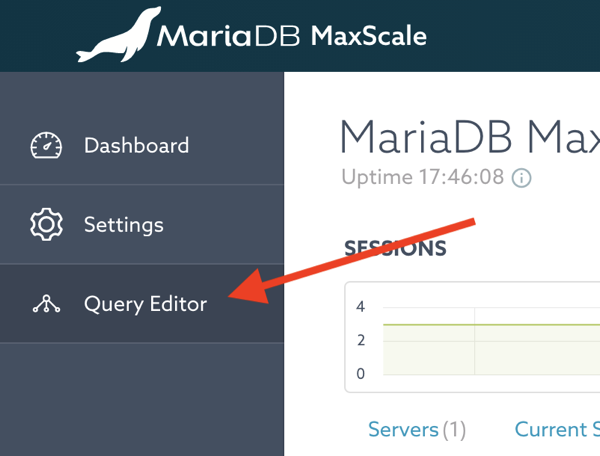
Query Editor
On the left side navigation you can select the “Query Editor” menu option.
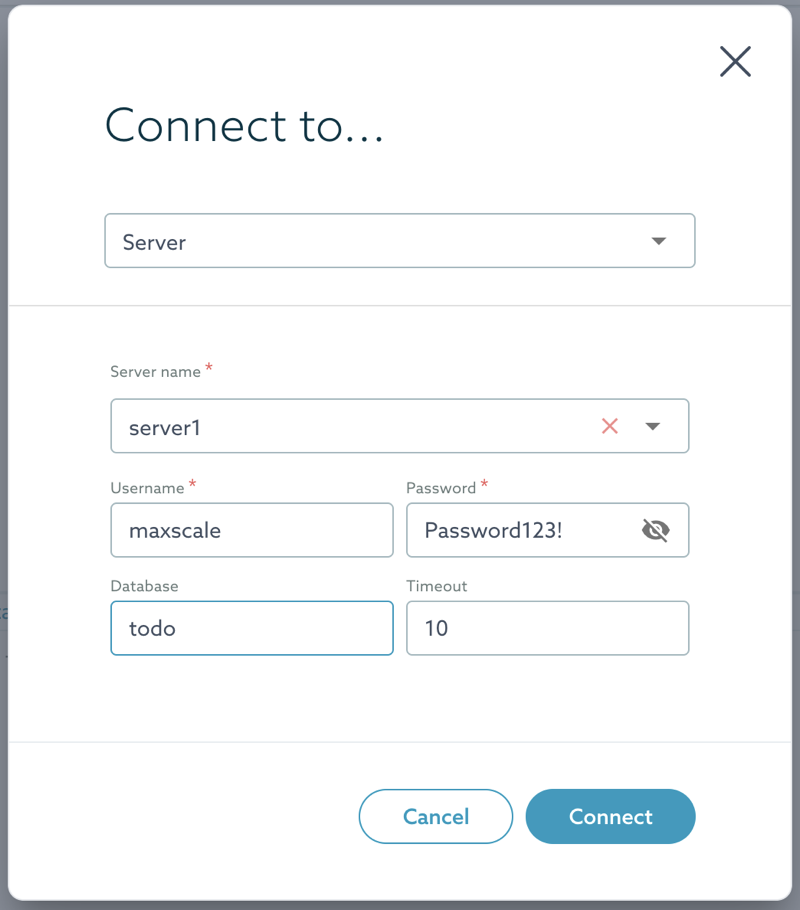
Then you’ll be prompted for connection information, which you can update at any time thereafter. For this you can connect directly to a server and/or schema within MariaDB.
For example:
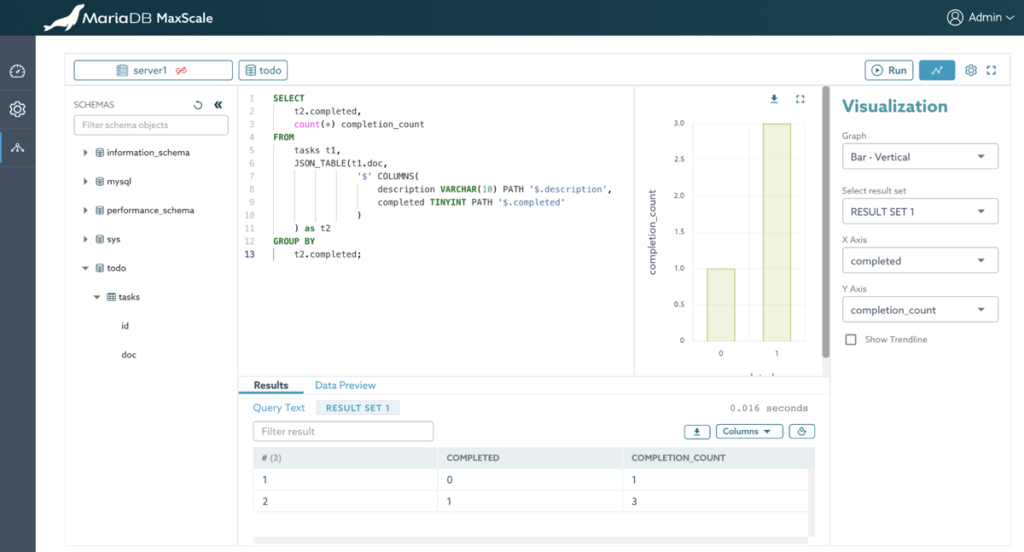
After you’ve connected, you can use the Query Editor to execute SQL queries, display datasets and even visualize the data using graphs and charts.
Mongo Shell
The mongo shell is an interactive JavaScript interface to MongoDB. You can use the mongo shell to query and update data as well as perform administrative operations, much like the MariaDB command-line client. You can download the mongo shell here.
Connecting to MariaDB
You can connect to MariaDB, using the mongo shell, using the following command:
$ mongo --host 127.0.0.1 --port 17017
And step into the todo database.
> use todo
Which will allow you to show the collections, or, in the case of MariaDB, the tables, within the currently targeted database.
> show collections
Querying Basics
Of course, at this point, this will only list the tasks table. You can also query the data within the tasks table.
For instance, you can select all the tasks that have been completed by executing the following command:
> db.runCommand({ find:"tasks", filter: { completed: 1 });
{
     "cursor" : {
           "firstBatch" : [
                {
                       "description" : "Task 1",
                       "_id" : ObjectId("612ad5859c58d2b2b46ca6fa"),
                       "id" : "612ad5859c58d2b2b46ca6fa",
                       "completed" : 1
                },
                {
                       "description" : "Task 4",
                       "_id" : ObjectId("612aec4b923b0597463743f0"),
                       "id" : "612aec4b923b0597463743f0",
                       "completed" : 1
                }
           ],
           "id" : NumberLong(0),
           "ns" : "todo.tasks"
     },
     "ok" : 1
}
mxsDiagnose
One neat feature that’s unique to MariaDB’s NoSQL listener implementation is the ability to provide diagnostics for commands; that is, how MaxScale will handle the command.
For instance, consider the command above used to select all completed tasks. Including mxsDiagnose will output the equivalent SQL that MariaDB uses to select the data.
> db.runCommand({mxsDiagnose: {find:"tasks", filter: {completed: 1}}});
{
       "kind" : "single",
       "sql" : "SELECT doc FROM `todo`.`tasks` WHERE ( JSON_EXTRACT(doc, '$.completed') = 1) ",
       "ok" : 1
}
But I’ve really only scratched the surface of what you can do with the mongo shell and MariaDB. For more information on how you can use the mongo shell with NoSQL listener functionality check out the official documentation.
Looking Forward
As you can see MariaDB’s NoSQL listener functionality goes far into providing more interoperability with NoSQL databases. But we’re just getting started! As I mentioned before, the NoSQL listener capability is currently in tech preview, but, as you can see, it has a ton of potential.
We want to hear from you! After you’ve had a chance to test things out, tell us what you like, what you’d change and what you’d like to see added. We’re really excited about this new functionality and the potential it creates for developers, and we want to hear from the developer community on how we can make it even better!
There are several ways you can contribute.
- Hit us up on Twitter at @mariadb.
- Email us at developers@mariadb.com.
- Submit pull requests to the repository in this walkthrough.
Learn more about developing modern solutions and applications with MariaDB on our new Developer Hub.
Check out the official MariaDB NoSQL Listener documentation.